Projects are normally created programmatically with ProjectDox Project Creator Service and a Project Template that is already configured. It will be uncommon for a Project Administrator to need to make any changes to these tabs, but there is value in knowing what these fields are used for. When using the ProjectDox Project Creator Service, the Project Name and Description fields are populated by transferring data from an integrated system.
Click the Project Info tab to change project information set in the Create Project screen.

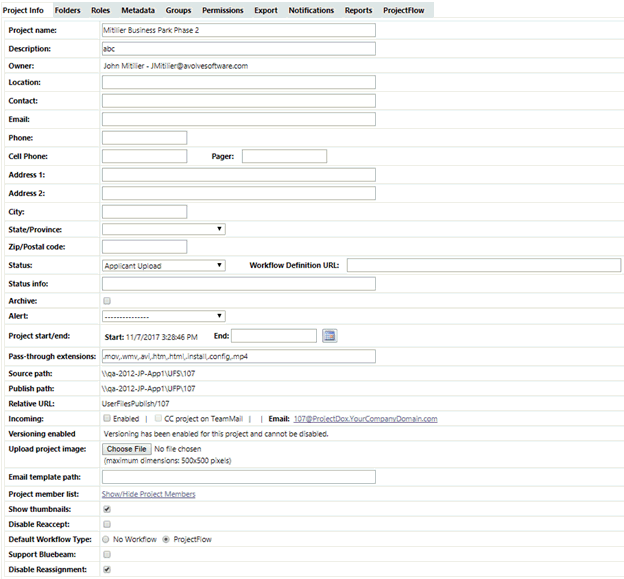
Workflow Definition URL – Entry field allowing the addition of a link to direct customers to an associated document, file or website. When the link is added, it will display to the end users in the Status row. For example, a jurisdiction may display a flow chart or drawing of the ProjectDox Workflow, the previous generation of Avolve workflow, in order to help the customer know where in the process the request is when the status reads "Prescreen."
![]()
Archive – Use to archive the project. A project may be archived for many reasons, including the response time expiring and fees not being paid. When a project is archived, it is removed from view but remains in the system until roadblocks are resolved.
Pass-Through Extensions – Use to enter file extensions that you do not want or are not able to publish and convert for viewing. For example, .mov and .avi files are not published for viewing but may be useful to the team for instruction or reference.
Incoming – Incoming email can be enabled or disabled on this screen ONLY if the System Administrator has enabled the Incoming feature for the site. The email address is created automatically by the system, and consists of the project’s projectID and the designated domain.
![]() Files contained in the Incoming email folder can
be copied but not moved to other folders within the project
Files contained in the Incoming email folder can
be copied but not moved to other folders within the project
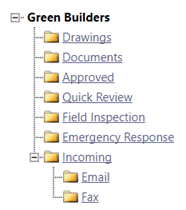
a. Enabled – Check this to allow email handling in ProjectDox. An email folder will automatically be created as part of the project folder structure when you enable Incoming on this screen. Emails addressed to the project must have the project’s email address in the To line or the Cc line, not the Bcc.

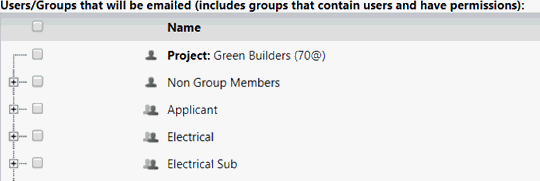
b. CC project on TeamMail - feature can be managed on a project-by-project basis. Note that this feature requires that the Incoming Email feature for the site be configured and function properly. CC project on TeamMail (when selected) creates a copy of any TeamMail or discussions sent from ProjectDox and sends a copy (by default) to the Incoming Email folder of a project. Once configured, this feature can only be removed by a PA or SA for the project.

Any emails for the project will go into the \incoming\email folder. Attachments to emails will be published by ProjectDox and a thumbnail image will show in the left hand pane. Users may perform the following actions on files in this folder: download, use discussions, delete, check in/out, copy, and compare.
Incoming Email
Incoming Email is a site-wide feature that can be enabled in the Edit Project Information screen. Each project of the site contains a unique email address that is used to send/store a copy of outbound email when the Project's Email item is selected in the Team Mail member list. Refer to "Implementing ProjectDox" for details on configuration, due to this feature requiring assistance from your email administrator.
Many times this feature is set up following the "discovery meeting," after the business entities have had time to understand what the feature can add to the business process.
Special attention should be given when applying the configuration file setting "SendEmailReply" to true or false. If set to true, a reply is sent to the sender notifying them that their email was processed, and the status of it. One impact of this is that if the web service is called from 127.0.0.1/projectdox instead of the correct URL, any images and CSS files will not be found and the email may render incorrectly. As a rule, you should always replace localhost or 127.0.0.1 with the correct URL.
![]() If sending an email to project email addresses,
they must be done individually. If more than one is added, only the
first project in the address line will receive it.
If sending an email to project email addresses,
they must be done individually. If more than one is added, only the
first project in the address line will receive it.
Versioning Enabled – Once versioning has been enabled for a project, it cannot be disabled for that project.
Upload Image – This field is used to include a thumbnail view of an image in the Project Info screen. The image will show up in the Project Image field and cannot exceed 500x500 pixels. The accepted formats are JPG, GIF and PNG. When the user’s mouse is placed on top of the thumbnail for the image, the image will expand automatically to its regular size.
Email Template Path -This field is used to specify a path to a sub folder for template-specific items. If no path is specified in this field, all emails that are sent to users will be modeled after the templates found in the ProjectDox\Custom folder. If no custom templates exist in ProjectDox\Custom, the default templates located in ProjectDox\Custom\en are used. The hierarchy for the email locations are:
ProjectDox\Custom\ProjectTemplateSpecific folder (example: custom Building invite).
ProjectDox\Custom folder (example: custom site-wide for the customer).
ProjectDox\Custom\en folder (default ProjectDox email files).
See ProjectDox System Administrator guide for further details.
![]() The system assimilates a forward or backward slash
in this field.
The system assimilates a forward or backward slash
in this field.
Show Thumbnails: Selection of the checkbox will display the file thumbnail images within the folders of a project. To hide the file thumbnails, remove the checkbox.
Copy Project ( available to SAs and users given Project Creation Rights) – Use the Copy Project button to quickly create a new project using the current project as a template. You will be prompted to enter a new project name, add a description, and select objects to copy. Select Folders Only to copy the project folder structure (no files, discussions, or markups). Select Folders & Users to copy both the folder structure and the user information (including roles and project groups) to the new project. Select Include Metadata to copy the project metadata fields to the new project. Select Include Notifications to include defined notifications for users established on the Notifications tab to the new project.
Click Save when you are finished modifying items on the Project Information tab.
![]()