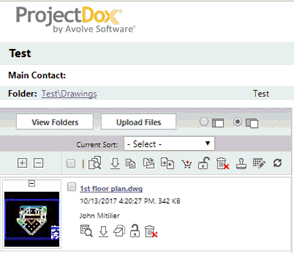
To view project files, enter a project folder by clicking the folder name. The left side of the window will display the files within the folder. Use the expand and collapse icons +/- to display just the filename or the thumbnail for the folder or choose the +/- icons at the top of each file to collapse each file individually.
By default, each file will be listed with a thumbnail, file name, upload date and time, file size, author (who uploaded the file), and relevant file action icons based on your permissions. To return to the folder view, click the View Folders button.


To see a larger version of the thumbnail without opening the file, move the cursor over the file.

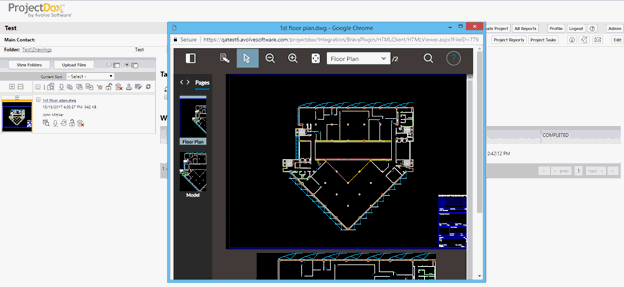
To view a large rendition of the file, left click on the on the file name or thumbnail image. The viewer will launch and display the selected file. There are two modes for displaying the ProjectDox Viewer window:
Set ProjectDox
Viewer in right-side panel 
Set
ProjectDox Viewer in separate window 
By default, the viewer displays in a separate window, full screen.

Using the Viewer in separate window mode allows you to have multiple Viewer windows open simultaneously.
Separate window mode can take advantage of multiple monitors: Viewer and ProjectDox windows can be viewed and moved independently between monitors.
The number of Viewer windows are affected by the client machine resources. If you find that the Viewer windows are getting slower, close some of the instances of the Viewer. Generally, eight windows fall within a good user experience.
To launch the viewer in
a separate browser window, click the  radio button
above the file list. You can switch it back at any time by clicking the
 radio
button.
Anywhere in ProjectDox that you see the Markup Exists indicator  , you
can launch the file with the desired markup overlaid.
Click the icon to display a details screen of the associated markups.
Click View to view one or more markup files in Brava with the markups overlaid for review only. You can select individual markups for view or edit, or use the Select All for View button to populate all of the View markup check boxes.
Click Edit to view the file in Brava and open the markup for editing. Only one markup may be selected for edit. The Edit and Delete columns will only be seen if you have markup Create and Delete privileges.
Click the View/Edit button to launch your selected markup layers in the ProjectDox viewer, along with the associated file.

The two icons to the far right are available for you to copy the file and markup as an external or internal link. Click on either option and the link will be copied to the clipboard.
A benefit of the external link feature is that you can copy the link to your email application outside of ProjectDox and send that link to a team member. If the team member has permissions to View Markups, when they click the link in the received email, they will be taken to the ProjectDox login page. When they login, the file will view in Brava with the Markup displayed.
A benefit of the internal markup link is that you can copy that link to other areas of ProjectDox, such as a 'Discussion Board.' Providing reference links from one file in a project to another file's markup file can aid in making decisions.
The Delete icon is only available if you have been granted Delete Markup permissions.
For help in using the Brava!
view and markup features, click the  icon of the
Brava! Viewer user interface to launch a full, separate online help system.
ProjectDox has activated the appropriate functionality for electronic
plan review.
![]()