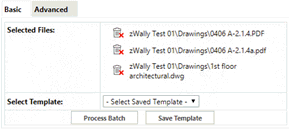
You can execute batch stamping using the Basic or Advanced tabs, as shown below.
Using Basic:
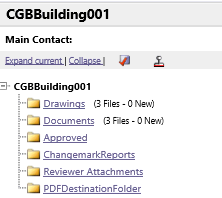
1. Click the folder name to access the project’s file view page.
2. Click the thumbnail image checkboxes to select the files you want to batch stamp or publish.
3. Select
the batch stamp files icon  . The Batch Stamp
options page appears in the right frame of ProjectDox with the files staged
for stamping in the Selected Files window.

4. Select a template from the dropdown.
5. Additional files can be added from other folders of the project prior to selection of the Process Batch button. To add more files to the Selected Files window, follow steps 1-3. To remove any file from the list before processing, click the red X next to the file name.
6. Once you are ready, click the Process Batch button to start the stamping process.
![]() The batch stamping process has the flexibility
to allow stamping across folders of a project, and across projects.
The batch stamping process has the flexibility
to allow stamping across folders of a project, and across projects.
To perform a batch stamp or batch publish across projects, follow the steps below.
1. Click the folder name to access the project’s file view page.
2. Click the thumbnail image checkboxes to select the files you want to batch stamp or publish.
3. Select
the batch stamp files icon  .
The Batch Stamp options page appears in the right frame of ProjectDox
with the files staged for stamping in the Selected Files window.
4. Click the Projects button and navigate to a different project.
5. Notice that the batch stamp icon still displays while in folder view. This is an indication that one or more files are staged for stamping. The icon will remain in the Selected Files window until the user completes one of the actions below:
Clicks the Process Batch button to process the staged files.
Deletes the files in the Selected Files window using the red X.
Logs out of ProjectDox.

6. Steps 1-3 are repeated for this second project
7. Click the Process Batch button.
8. The files processed from all the projects will be uploaded into the designated destination folder for the last project accessed.
![]()