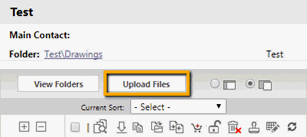
You can upload files to any folder for which you have Upload privileges by clicking Upload Files:

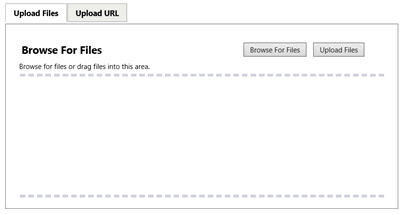
The HTML uploader screen will display:

The System Administrator determines which file types can be uploaded. If you attempt to upload a file type that is not allowed, you either will not be able to see it in the list (if using Browse For Files, or if using drag-and-drop, you will receive a message indicating the file type is not allowed. The following is a list of invalid characters in a file name for upload:
< (less than)
> (greater than)
: (colon)
" (double quote)
/ (forward slash)
\ (backslash)
| (vertical bar or pipe)
? (question mark)
* (asterisk)
= (equal)
Files can be consolidated into .ZIP files to save on upload time to the ProjectDox application. When the ZIP file is uploaded successfully, the application will unzip the file and process the files in the folder as individual files. ZIP files cannot be retained in folders within ProjectDox. Once the file is uploaded, any hierarchy that existed in the zip will not be recreated. It should also be noted that any files that are not allowed will keep the .ZIP file from publishing, as seen below.
1. Use one of the two following methods:
Click Browse. A navigation window will display to locate and select the files you would like to upload to the current folder. Click Open to select the file(s).
Open a Windows Explorer window and use drag and drop to place the selected files into the control window. (When using drag and drop to move files, the Add dialog box should be closed.) When you have completed your selection, click Upload, or to begin again, click Cancel.

2. The image above shows the uploader dialog with files selected. You can:
Delete selected files from the list by clicking the “x” to the right of the file size.
Click Browse For Files to select additional files.
Drag and drop additional files onto the file list area.
Click Upload Files to complete the upload.
Click Close Window to cancel the upload.

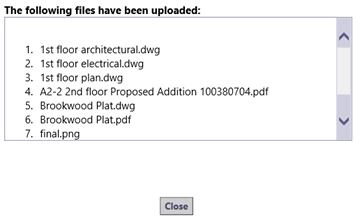
3. When the file uploading has completed, a dialog box appears. The publishing process will continue in the background until completed.

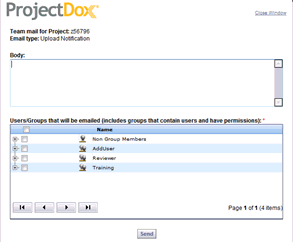
4. If the upload notification feature is enabled, you can send a notification email to other project members by clicking Notify Project Members. Otherwise, click Close. If you choose to send a notification, a new dialog appears. The interface is similar to the one for showing the list of project members:

![]()