The Remote Job Queue Manager allows the export of files from the Avolve hosted server to a single destination drive on a customer server. The installer is given to the customer to install onto only one of their network servers. That single installation will create a Service that is polling the URL in the configuration file at a minimum every (5) five minutes, as set in the config.
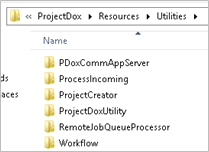
1. The installer is named ProjectDox.JobQueue.Processor.msi found in: ProjectDox\Resources\Utilities\RemoteJobQueueProcessor
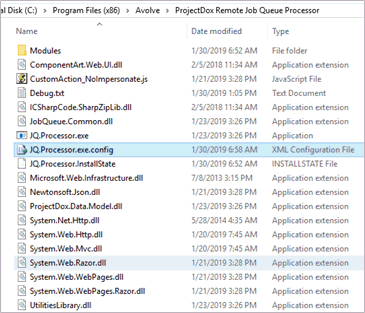
2. Install the MSI and open the JQ.Processor.exe.config file in Program Files (x86)\Avolve\ProjectDox Remote Job Queue Processor
· Cannot install over an existing installation, must uninstall and reinstall
· Version is 1.x.x - not consistent with ProjectDox versioning. Using Microsoft Visual Studio installer will not allow for a X.X.X.X versioning scheme
3. Update the three appSettings values fro the URL.
· It is recommended that a user named ExportReserved@<your jurisdiction>.com be created in ProjectDox specifically for this application and it should not be used for any other purpose.
· Generate a strong password, at this time it cannot be encrypted.
<appSettings>
<add key="ConsoleMode" value="true" />
<add key="InvokeDelayInMinutes" value="5" />
<add key="ProjectDoxWebAPIBaseUrl" value="https://<full URL>/projectdoxwebapi" />
<add key="ProjectDoxLogin" value="[email protected]" />
<add key="ProjectDoxPassword" value="password" />
</appSettings>
4. The Service is invoking Project/ProcessExportForDownload method:
Processes the export for download. The FileIDs, FolderIDs or the FolderPaths collection must be specified. The ProjectID or ProjectName must also be specified. All the other properties can be left blank to default to standard settings. The FolderPaths should be in the format folder1/subfolder1|folder2/subfolder2.
 Use
the "/" instead of "\" because of .NET web API
handling of "\"
 Session user must be a System Administrator.nj
2q
5. Start the Service using the Local System account, if that does not have sufficient permissions, run the service as an account that has read/write access to the destination folder.
6. Check the debug.txt to confirm that the Service had no errors.
· If errors, correct them and restart the service.
7. On the server where the service is installed, create a folder that will receive the exported package. This folder will be typed into the Destination Folder field in the Project Export Template.
· This folder is indicated as a drive letter or a share.
· Confirm that the user running the service has full permissions to the folder.
8. Go to the ProjectDox installation and create or update an export template.
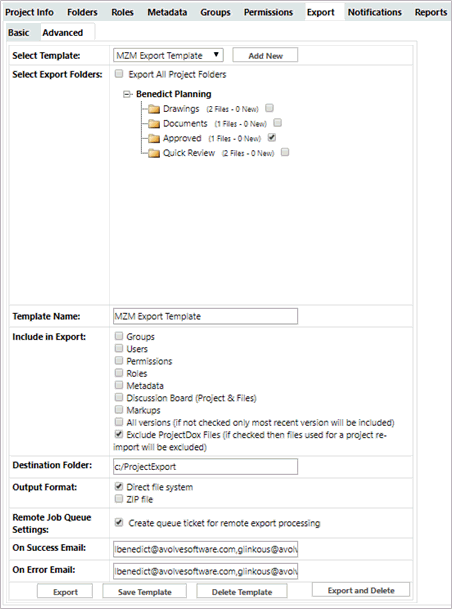
9. The new settings in the Export Template dialog
· Exclude ProjectDox Files, default is unchecked
· The Destination Folder in this example is c:/ProjectDoxExport
· Place a checkmark in Create queue ticket for remote export processing
· Complete the On Success or Error Email fields
§ Use a comma deliminter for multiple email addresses
10. Click the Export button. The following message will display.

· The export is first going to PdoxTemp shared folder in the ProjectDox environment, then downloads to the local customer network folder.
 Disk space must accommodate the volume of exports on the shared
environment server. The ProjectDox Utility Service, by default, is
set to delete files older than 24 hours. The disk space can fill up
quickly depending on the number of projects exported and the size
of the files. A full drive will produce a failure in the export if
there is no disk space.
· When the ProjectDox Utility Service runs, normally every 5 minutes, the export will be processed.
11. The processing is logged in Admin, Remote Job Queue Manager and must be manually Refreshed with the link provided on the top left of the grid.
12. When the process has a status of “Error”
· The user elected to receive error notices via email, investigates the issue.
· The user fixes the error then returns to Report Job Queue Manager and updates the Status for the Project Export from Error to Pending.
· Click Save for the line item, then click the Save at the bottom of the screen.
· The process will run again when the Utility runs.

13. The Scheduled Tasks Manager now has a task namedProjectExportTask Process set by default at Low Priority.
· 70% of the tasks are assigned as short running/high priority tasks and 30% are assigned long running/low priority tasks. If you have 10 max threads, 7 will be high priority and 3 will be low priority.
· You can increase the value of MAX threads which will speed up the processes going through the pipe as long as your server hardware can handle it. This is done on a case by case basis.
14. There are currently only two Tasks in ProjectDox set at High Priority.
a. Workflow Engine Process
b. Batch Stamp Files Task Process

Each export will be identified by the project name

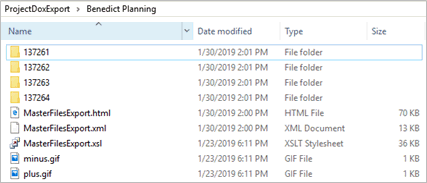
· Each file is contained in its own folder structure. The sample below is:
\ProjectDoxExport\Benedict Planning\137261\Baseplat.dwg\source

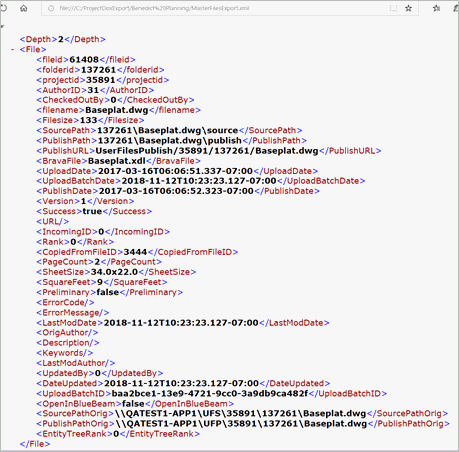
· The file names and details can be extracted from the MasterFilesExport.xml.
· There is no dependency on the web config entry:
<httpRuntime maxRequestLength="104857600" executionTimeout="7200" requestValidationMode="2.0" maxQueryStringLength="2000000" />
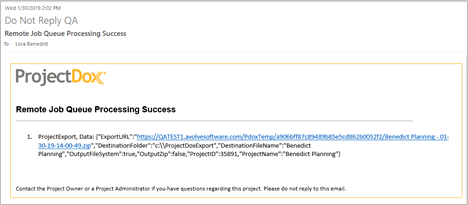
· Both success and failure emails are stored in the standard email path on the web server, \ProjectDox\Custom\en folder.
a. JobQueueItemsProcessedFailed.html
b. JobQueueItemsProcessedSuccess.html
![]()