The Markup toolbar contains tools for adding markup entities and Changemark notes (annotations) to the current file. The Markup toolbar is displayed on the left side of the viewer when you:
• Click
 from
the functions toolbar.
from
the functions toolbar.
• Click
 and select New.
Additional markup tools are available by clicking on any arrow that exists to the right of the currently displayed tool. Please see the Properties section of this document for available tool options.
|
Select Entity. Use to select and edit markup attributes, resize, reshape, rotate, copy, or move entity. |
|
Arrow Pointer. Use to add arrows to your images. The arrow head is set at the first selection point. |
|
Text. Use the Text tool to insert text directly on the image (rather than in a note). Use the Markup Properties tools to change the font name, size, etc. |
|
Changemark.
The Changemark tool allows markup authors to type or copy/paste
in detailed text in a scrolling window. Authors can also add hyperlinks
to point the user to additional information. Reviewers
simply need to double-click on the markup entity while in select
mode Changemark combination tools: These tools are available purely for convenience. With one single click, you can add a Changemark
with either a Highlight
Highlight
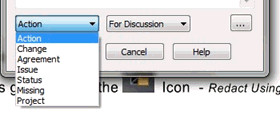
Changemark Type and State: Type and State are attributes that can be assigned to the original Changemark content and to each reply that is added to a discussion. After the Type is selected, the State drop-down will show only the States associated with the currently selected Type. Types and States can be customized in the ChangemarkConfig.xml file.
|
|
Checkview: This tool, available from the Changemark group, allows users to tag certain spots within similar documents that require efficient review for verification of completeness (such as signature). Similar to Changemark notes, the tags can be reviewed sequentially in the Checkview tab and maked as OK or not OK. |
|
Insert Image. Use this markup tool to insert external raster images (JPG, BMP, or PNG) into your current markup layer. Once selected, images can be resized and positioned where you want them. You can set multiple instances of this same image entity or use the Browse button in the Markup Properties bar to choose another raster image to insert. The properties bar also contains a list of 10 most recently used images which can be individually selected and inserted. |
|
Add Markup Stamp. If Stamp Templates have been authored and saved, the markup stamp button is available on the Markup Toolbar. When clicked, a list of available markup stamps is shown that can be added to the current markup layer. The stamp template is a group of markup entities that have been defined as a single unit and all elements of the template are resized and moved as a single entity and cannot be edited otherwise. Color, content, and other elements are defined by the author when a stamp template is created and saved. When a stamp is inserted, if a dynamic text field (such as %Page, %Date, %dbstring(value), etc.) exists, the field is resolved and results are populated in the stamp. |
|
Electronic Signature. Inserts a user-specific signature image that can be used to digitally sign documents. |
|
Cloud and Polyclouds. Add cloud or polycloud shapes on your images. |
|
Highlight. Creates highlight entities by drawing a rectangle. Unlike the filled shape entity, highlights do not have the option of being filled or hollow. |
|
Sketch and Polysketch. Use this tool to draw freehand shapes and lines on your image. Polysketch can be filled or unfilled. |
|
Crossout, Scratchout, Arc, and Line Tools. Use any of these tools to add linear shapes on your documents and images. The mouse cursor will change to reflect the tool selected. Line width and style can be selected in the markup properties toolbar, with additional arrow end styles available for the Line Arrow tool. |
|
Rectangle, Rounded Rectangle, Ellipse, and Polygon shapes. Shapes can be used as highlights or hides, and can be filled or hollow as determined by your selection in the Shape Properties drop down. Use the Hides shapes to cover or “hide” areas of the image. Hides shapes are automatically the same color as the background color. The mouse cursor will change to reflect the tool selected. Note that hiding an area does not remove text from search. |
|
Edit Text. You can strikeout, strikethrough, highlight, and underline selectable text contained in a drawing or document. Simply drag a box around the text area you want to include to select and mark it. |
![]()


 to
review the text, or automatically scroll through each Changemark
contained in the Changemark list by clicking a Next arrow. See
Also "
to
review the text, or automatically scroll through each Changemark
contained in the Changemark list by clicking a Next arrow. See
Also " ,
Text
,
Text
 , Text
Strikethrough
, Text
Strikethrough  , or Arrow
 .
Once added, the two entities behave totally independent of each
other.
.
Once added, the two entities behave totally independent of each
other.