Select files to be stamped, then click the Batch Stamp icon.
Select the Advanced tab and select a predefined template.
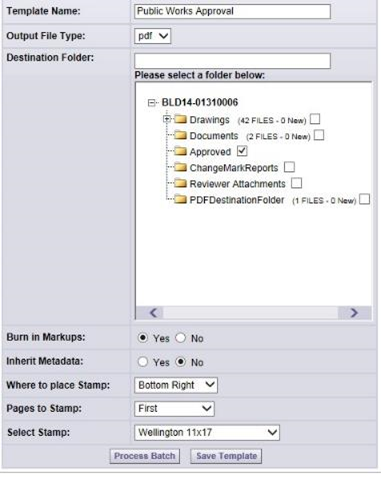
In the Select Stamp area, choose the stamp template that you just created and process the batch. In this case, the Stamp name is “Wellington 11X17.” This is where the Stamp Template and the Batch Stamp Template come together.
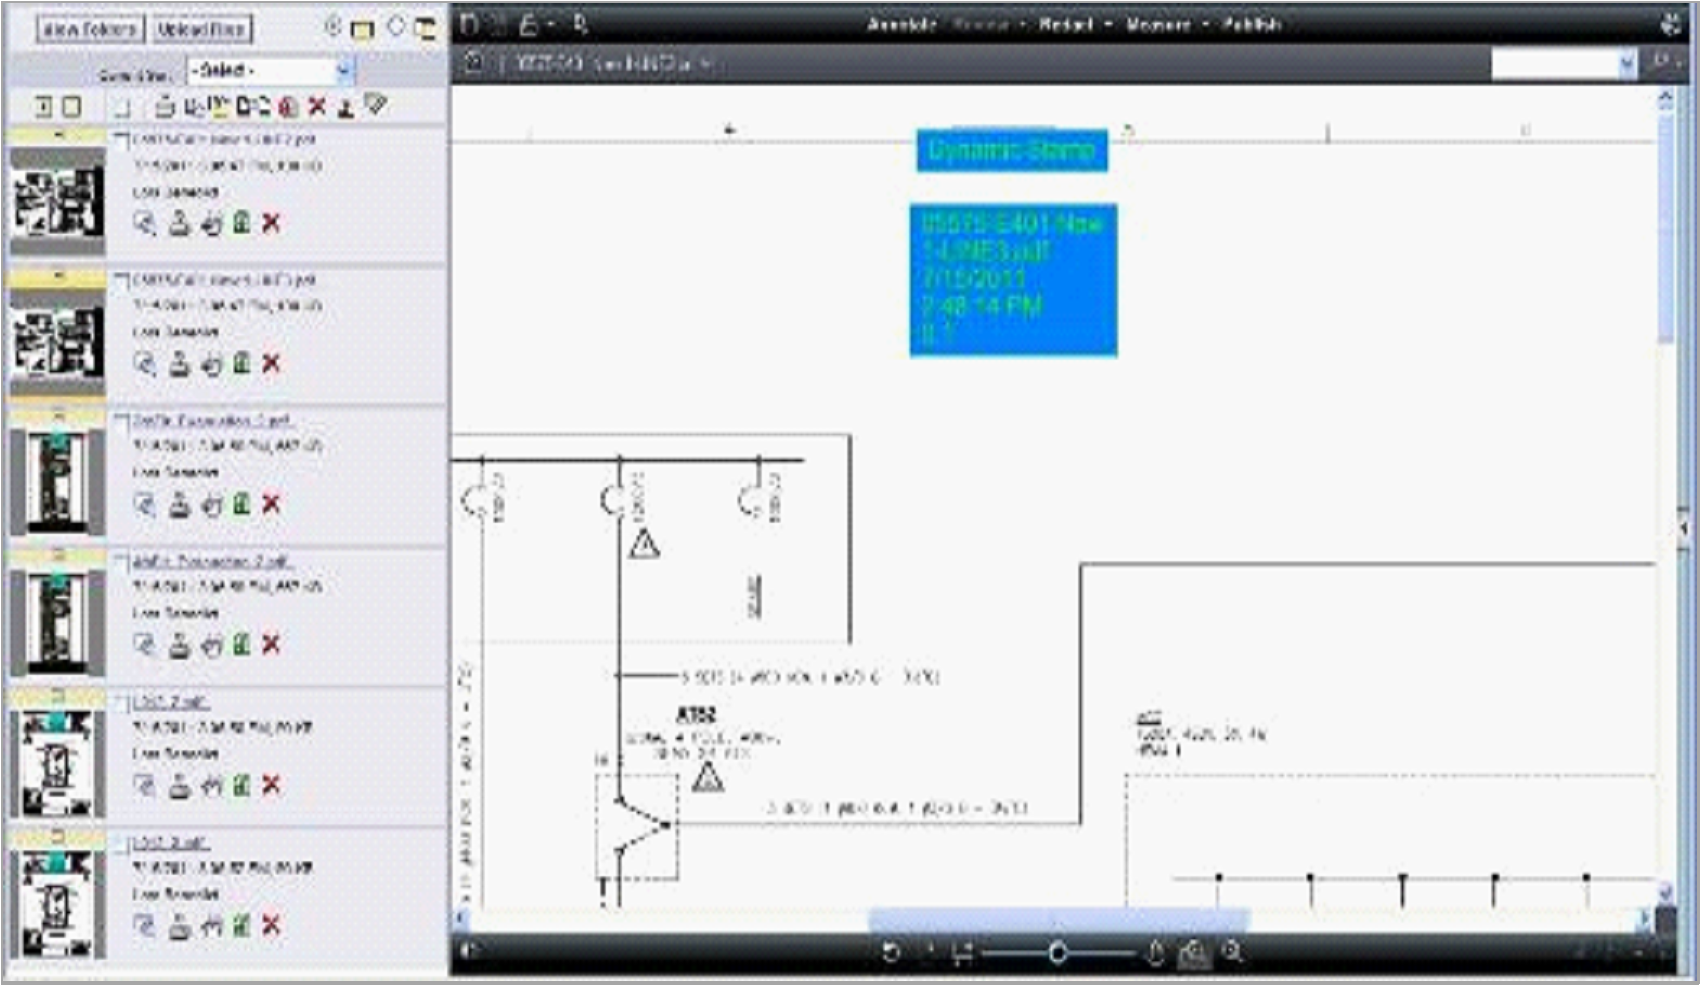
When you view the output file in the destination folder, you will see that the stamp is applied to all processed files and the values of the tokens are updated with the specified information.
![]() The original file in this example
was a PDF and has also been selected as the output format.
The original file in this example
was a PDF and has also been selected as the output format.
Images (JPG, BMP, or PNG files) can be inserted into a single file with the "Insert Image" Markup tool. Using the same tool, the images can be inserted when creating stamp templates to be used with the Markup Stamp tool.
The following special considerations apply to the creation, use, and behavior of images in Brava:
The image should be created in the desired size and off set of the image. Brava will not scale the image. If the image is created at 2 inches by 2 inches, it will be placed at that size on either a 36” X 48” sheet or an 8.5” X 11” sheet. In the example, the name of the stamp contains the size of the file it is best used for (Wellington 11x17)
Once created, the stamps must be loaded to the server in a location available to the Job Processor.
Black and white images have special behavior when viewed in Brava:
If an image is "black" and "white" only, the black pixels are drawn with the entity's current color and white pixels are drawn transparent.
What determines whether an image is considered color or black and white? Brava examines every pixel to determine if it is 0,0,0 (black) or 255,255,255 (white). The test has a tolerance of 60, meaning that a pixel is considered black if all of its values are within 0 to 60. A pixel is considered white if its values are all within 195 to 255.
If an image contains a third color, outside of the black/white tolerance, all colors are drawn opaque.
![]()